
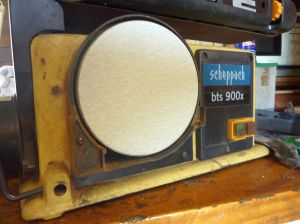
Scheppach bts900 Disc and Belt Sander Overhaul
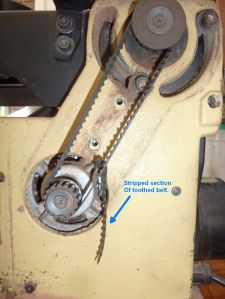
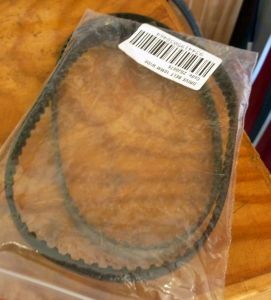
I’ve had my Scheppach bts 900 sander for some years I’ve replaced the toothed drive belt once in that time.Just prior Christmas while using it I noticed the belt sander when being used was stalling and juttering. On closer inspection my hunch was proved right the belt needed to be replaced yet again. It had de-laminated as photos show.
A very simple easy fix!!?? just require a replacement belt right? WRONG!!!
Hare & Forbes like many other places through Christmas and New Year were closed. I don’t blame them we all need family time. Finally ordered the belt……and a few other things so postage wasn’t more expensive than the part.
Generally the procedure to replace the belt is release the tension on the nut and screw under the belt sander, slip off the old and slide on the new. Re-tension via the screw and lock nut.
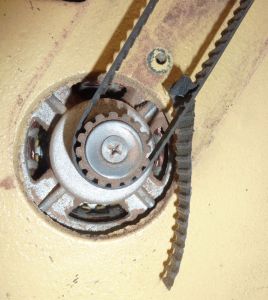
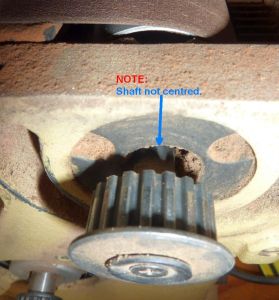
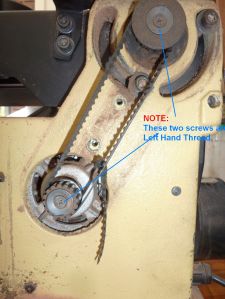
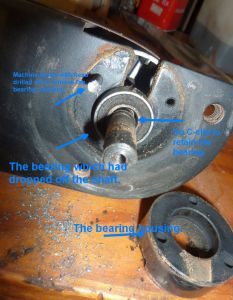
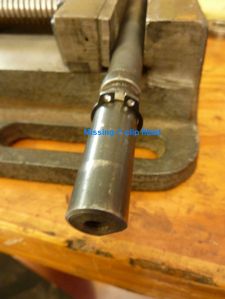
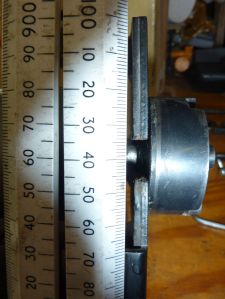
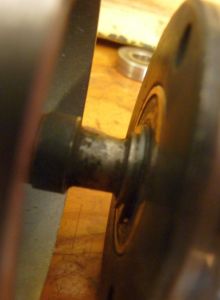
When I released the tension and started to remove the belt the top pulley moved quite a bit. I knew that should not have happened. The photo below shows how far the shaft is of centre.
Word of warning ! The screws on both pulleys are LEFT HAND THREAD.
I’ve have tried to cover as best I could with photos and words the strip down.
Remove the linishing belt.
Undo the lowe plate screws and remove the safety guard.
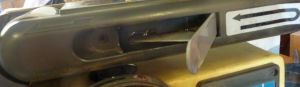
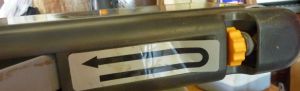
To remove the plastic cover there is one screw inside the leaver area and two screws hidden under the feed direction tag one at either end of it. You’ll be lucky to replace this tag. I suggest warming it with a heat gun or hair dryer to soften the glue. Place it somewhere safe from dust and dirt, in hope it will re-attach. I cut mine down so the screw holes are no visible in the future.
Remove the two large hex bolts retaining the linisher table these are the ones in the slotted area.
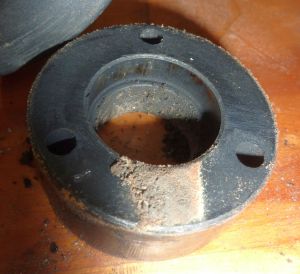
Tap out the bearing housing from the casting towards the table side.
I should have known better than the pulley screw was frozen and could not remove the screw using an impact driver.
I had tried the three retaining screws for the bearing housing also in behind the pulley. Two were stubborn but finally came free only using the impact driver. The last one had to have the head drilled off and latter vice grips used to remove it.
The two large cap screws which secure the table for the sander also lock the table into position of any angle. These are the only two screws required to undo and remove the belt sander table.
In removing the table I began to drill the head off the pulley counter sunk screw the action of the drill grabbing in the Phillips slots loosened the screw, sadly not before damaging the slots.
The three bearing housing screws only secure the housing to the table bracket. I had undone these after removal of the pulley. The bearing housing needed a slight tap to remove it from the casting.
Once I had begun to remove the table or during lifting it up I noticed three things.
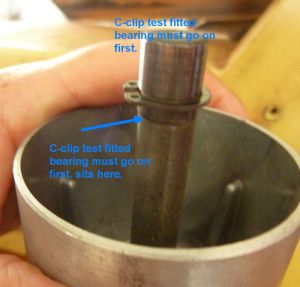
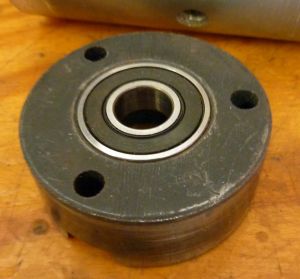
1 The bearing was off the shaft shoulder where it should have been retianed with a C-clip and fell out of the housing.
2 There was no sign of a C-Clip which was supposed to be retaining the bearing on the shoulder of the shaft. Not even metal remains of said clip.
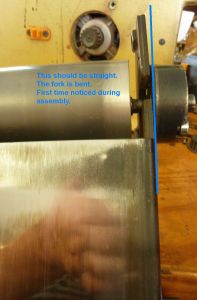
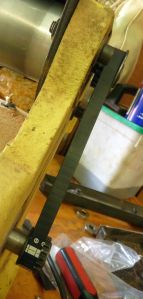
3 Then latter the shock when assembling it all, finding the table arm was bent where it was all mounted to.
Obviously it had been dropped or damaged during our move so I thought. It was bent opposite to what would be expected. I am usually the only one using it, f it had fallen off the stand prior the move it was my fault (nope). Maybe a visitor knocked it off or picked it up by the table area and it bent. I’ve jumped ahead here.
Back to task at hand.
I had used the sander quite a bit since unpacking but looking at the damage done from it sitting off kilter to the inside of the arm, shows it must have been damaged long before our move. I thought that with the bearing having moved on the shaft with no C-clip to retain it was what caused the damage. it was not that alone I latter found.
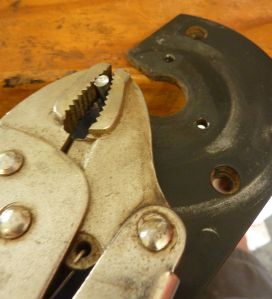
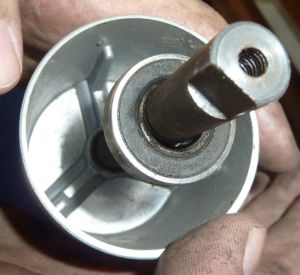
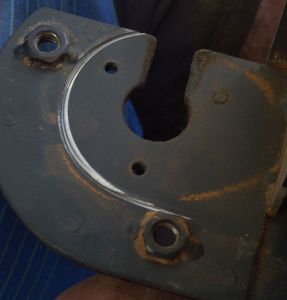
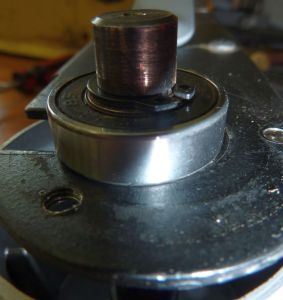
Photo Left showing the position of the bearing which should at least have been a push fit.
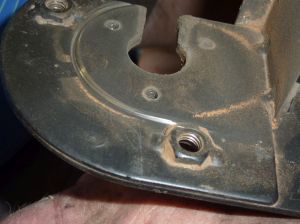
Right and below left the scoring damage done to the inside of the fork.
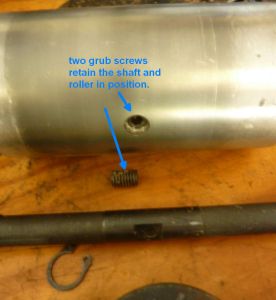
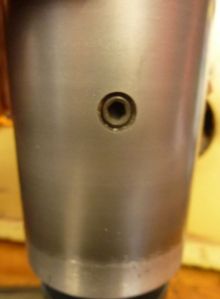
To remove the Main shaft from the roller there are two grub screws centrally located on the roller one below the other in the same hole.
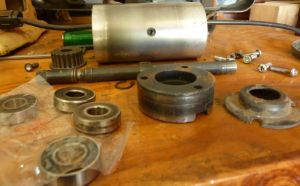
Both bearings replaced and new belt arrived, picked up a box of C-clips from Hare and Forbes when picking up bearing from the bearing supplies just around the corner.
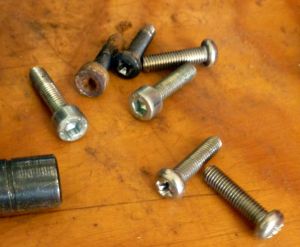
Sifted through my supply of hex cap screws and Phillips machine screws for replacements for the bearing cap. I went with Hex cap.
Then began the reassembly.
That is when I noticed the bent fork arm when I mounted the roller. Obvious now why the inside of the fork had so much damage along with the missing C-clip and bearing movement.
I clamped the frame to the bench and a few well placed hits with the hammer brought it back into line. Care must be taken not to over work or alter the tongue in an adverse direction.
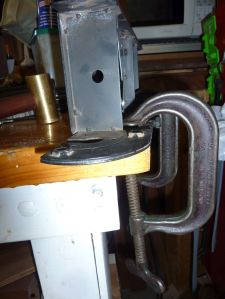
 That looks close enough.
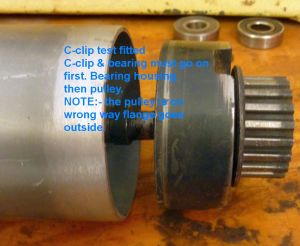
Below is the other end bearing assembly process, its location to the C-clip’s sorry no photo of the bearing cap.

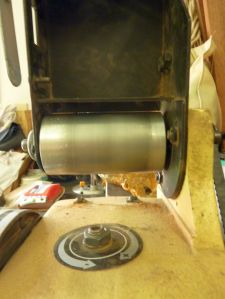
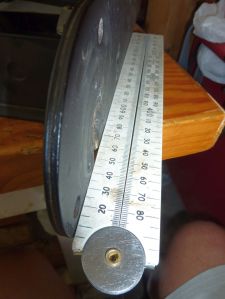
Below is the underside view of the table mounted. Note the lock nut and adjusting screw for belt tension. Remember to re-tension the belt.
Check alignment of the pulleys making sure the top pulley is in correct orientation and fit the belt.
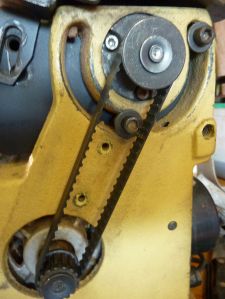
This is all re-assembled using the damaged LEFT HAND THREAD screw for now an order has been placed with Hare & Forbes for a $5.50 screw from Germany still yet to arrive. There is nowhere that I could locate one M5 x .8 x 19mm left hand thread counter sunk machine screw through known sources. Thanks goes to ken for making me triple check thread pitch.
Yes I could machine one up or locate a left hand die to suit it is all about the cost over all.
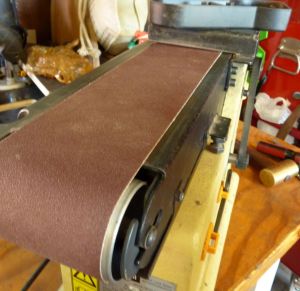
Reassemble the linisher table. I fitted a new 100 grit belt and a 120 grit sanding disc.
I await the left hand machine screw.
No comments:
Post a Comment
Your comments are welcome please forgive us if not replied to immediately.